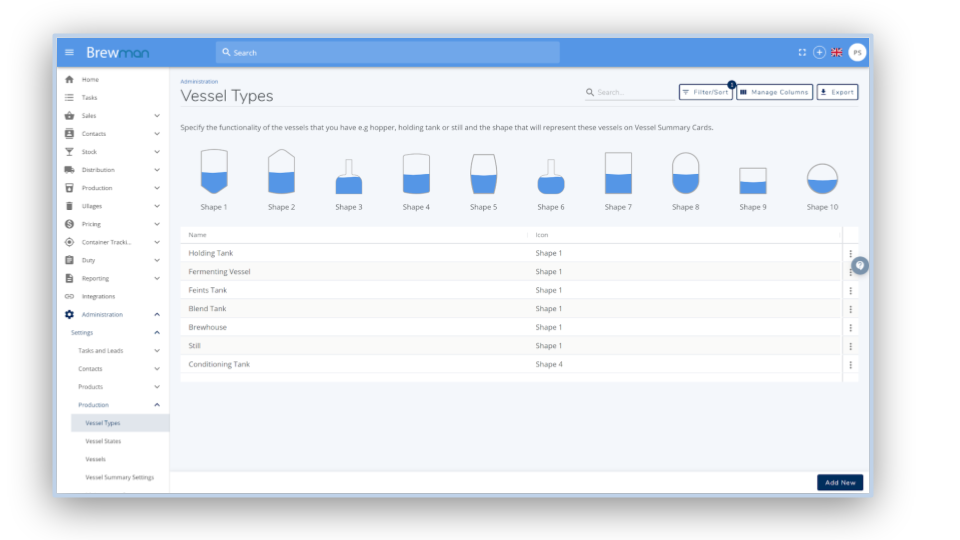
Vessel Types
Vessel Types are used to categorise groups of Vessels. For example, we would group together our holding tanks, stills and fermenters into their own Vessel Types.
Go to Administration → Settings → Production → Vessels Types.
Click Add New in the bottom right, enter the Name of the Vessel Type and click Save. Repeat until all types have been added.
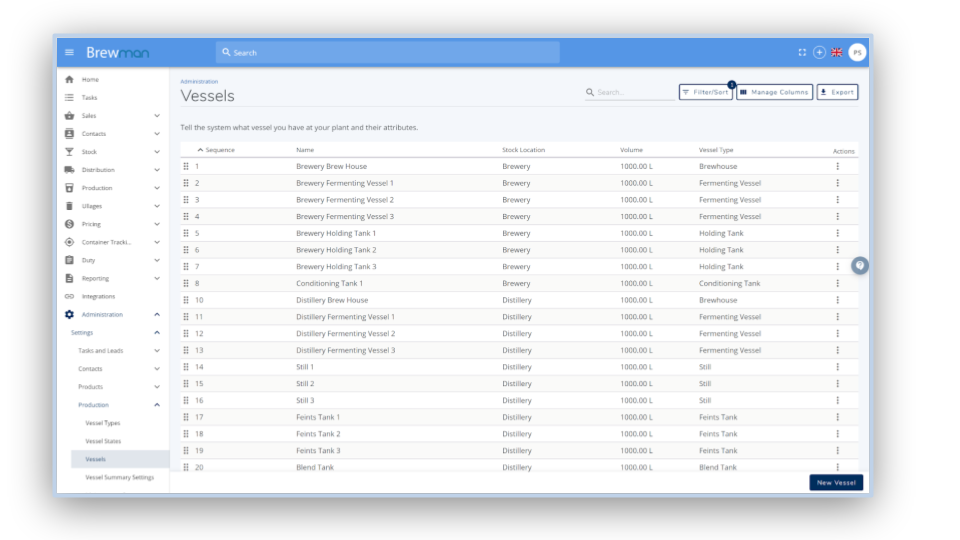
Vessels
Go to Administration → Settings → Production > Vessels.
Click Add New and fill in these details:
Name - Enter what you call the vessel. e.g. Holding tank 2.
Vessel Type - Select the Vessel Type from the dropdown menu.
Location - Select which Stock Location the Vessel is in from the dropdown. This might be particularly important for calculating Duty if the location is Bonded or Non-Bonded.
Volume in Litres - Enter in the maximum volume capacity of the Vessel. BrewMan will then not let you exceed this limit in the Production process.
Colour - Enter in a colour for the Vessel Summary screen. A defined colour scheme may make it easier to visually understand the processes in progress.
Maintenance Schedule
Process - Select the Maintenance Process that applies to the Vessel.
Due Every - Enter how often the maintenance is required in either Days or number of Uses so that the system can flag that the process is due.
Click Add and repeat for multiple Processes against one Vessel.
Click Save and your Vessels will form a list. On this list, you can use the 6 dot buttons to drag and reorder your list of Vessels. This will impact the order in which they appear on the Vessel Summary Screen.

Quality Control Tests
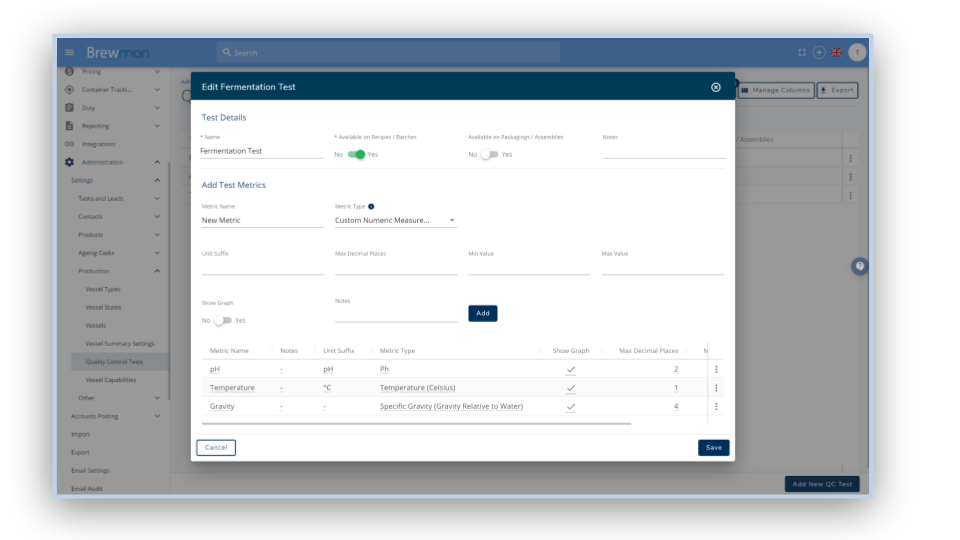
Go Administration → Settings → Production → Quality Control Tests and click Add New QC Test.
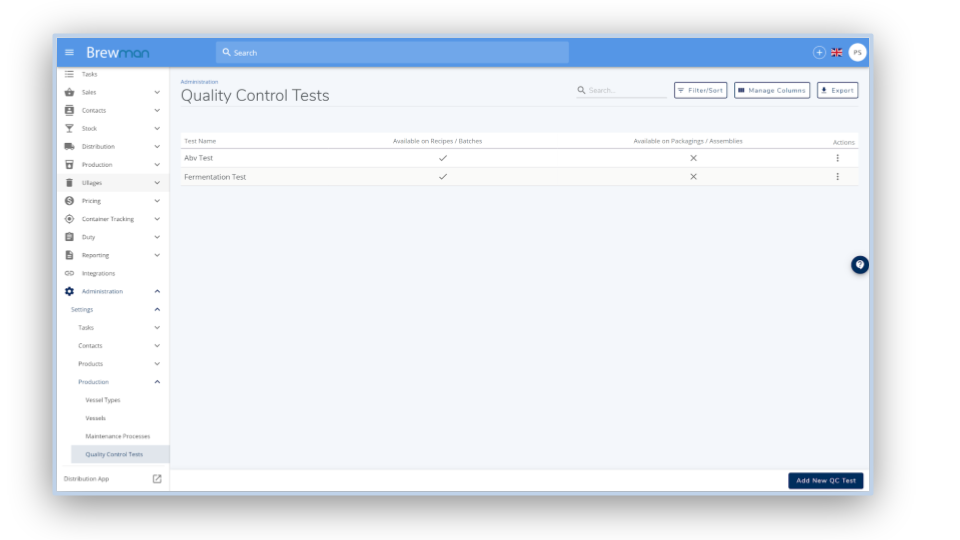
Name - Enter the name of the Quality Control Test e.g. Fermentation Test. Please note one 'Test' can have multiple Metrics so a fermentation test could require pH, Gravity and temperature to be recorded.
Then select if this test can be used for Batches from a Recipe such as when making beer or gin or whether it can be used for Packaging from an Assembly such as when bottling vodka or racking a cask of ale.
Click add New Metric:
Metric Name - Enter a metric you want to record, such as temperature.
Notes - Enter any notes for when recording this Metric.
Unit Suffix - Enter the measurement symbol. E.g. °C or %.
Show Graph - Tick if you would like the results displayed in a graph.
Max Decimal Places - Enter the maximum number of decimal places you will allow someone to enter in a reading.
Min Value - Enter in the smallest value. For example, for pH it would be zero.
Max Value - Enter the largest value for the test. For example for pH it would be 14.
Click Save and your Quality Control Test will form a table. Once in the table click the 3 dots button under the Actions column to edit or delete a test.
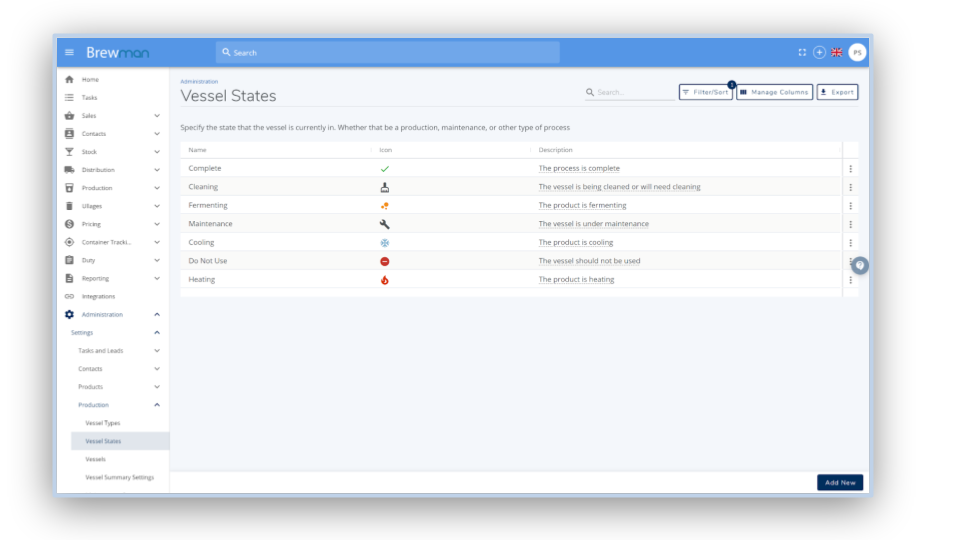
Vessel States
Click Add New in the bottom right corner and give the state a Name, Icon, Colour and Description.
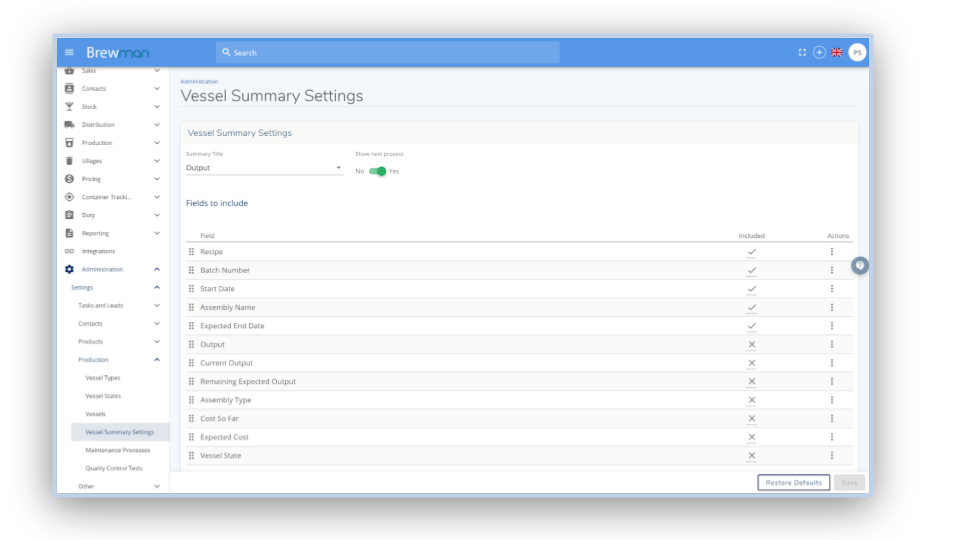
Vessel Summary Settings
Summary Title - This is referring to how the liquid in the vessel is kept. E.g. using the batch number will change the title to be the Batch Number.
Show next process- If you select “Yes” the vessel summary card will include the next due Process Step according to the batch information.
Fields to include- Here you can select which fields will show on your Vessel Summary Screen Cards.
The drag handle (The icon showing 6 dots) allows you to reorder the fields on the card.
Included- Clicking on the underlined icons allows you to select whether the field will be included on the card or not. Selecting “Yes” will have set the field to show.
Actions- The action menu at the end of the row also allows you to hide fields from view.